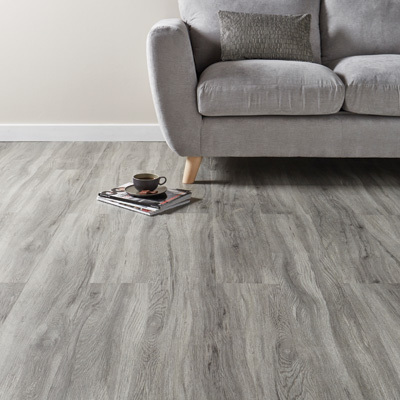

Luxury Vinyl Tiles, or LVT, are the perfect flooring for many people, ensuring a 100% waterproof and hassle free floor that is designed to last many years, even in high traffic areas.
With many quality brands available in LVT, such as Lifestyle Floors, LG, Karndean, Quick Step, Polyflor, Luvanto and more, the principle behind installing LVT correctly is mainly the same.
Make sure to measure the are you require, and to allow 10-15% extra when ordering.
Subfloor
Subfloor preparation is key, and is where to start with any LVT installation. Whether it is a click system or a dryback (stick down) application, it is imperative to achieve a level subfloor before installing your LVT, or the warranty may not be valid.
For most wood subfloors, if uneven, such as floorboards, it is usually recommended to install flooring grade ply of at least 6mm thick, which will take out any subfloor unevenness as well as helping make the subfloor moor rigid, ready for installation of an LVT of your choice.
It is also necessary to apply a feather coat finish to seal any gaps where the ply boards meet, or where the screws have been used to hold down the plywood, this will ensure a perfect finish for LVT installation.
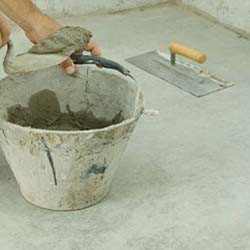
For concrete subfloors, a coat of primer and at least 3mm self levelling compound (screed) may be required if the subfloor is not even. Once this is done and the screed is dry, then you can begin installation of your chosen LVT. This will also ensure the LVT will stand the test of time and not wear out prematurely.
Make sure to always read the label of the screed being used so that you allow the appropriate drying time prior to installing your LVT flooring over it.
It is always important to check that your subfloor does not have any damp issues prior to any installation, as this also needs to be addressed if there is damp - luxury vinyl tiles need to be installed on clean and dry floors.
Accessories
It is also very important to have the correct and necessary accessories for installing your LVT flooring, such as the correct adhesives as recommended by the manufacturer of whichever LVT flooring you are using, as well as the correct tools such as trowels, heavy duty roller and cutting knife. Some click system LVT flooring requires an underlay, be sure to use the correct one for your floor.
Installation
For click system LVT flooring, you can treat it similarly to installing a laminate floor, leaving an expansion gap around the edge of the room where you are installing it. Expansion gaps can be covered using beading.
For dryback or stick down LVT flooring, use the appropriate notched trowel as recommended by the manufacturer to spread the adhesive onto the subfloor before sticking down the vinyl tiles on top of it. If a pressure roller is required make sure to use the correct weight as this will help the LVT floor adhere even better and will ensure the vinyl glue has a high grab.
If installing a click system LVT, some ranges require a separate underlay, such as the SoundClick underlay which is specifically engineered for LVT click installations. Be sure to check the recommended underlay for these installations as the underlay should be thin (around 2.5mm) and firm.
Starting from the door, and working a straight row towards the adjacent wall, create your first row as a guide. Once this is installed, you can easily install your LVT flooring from this guide working outwards. This will give your floor a neat and centralised installation.
Advanced installations can incorporate custom borders and designs which also look fantastic and can help make your LVT look even more unique.
Visit our handy Advice Centre for more information on measuring and installing for luxury vinyl tiles.
 Carpets
 Decking
 Grass
Grass Roll Ends
 Wall Panels
 Laminate
 Wood
Wood Vinyl
Vinyl Rugs
Rugs Accessories